
Using Teams to Record Your Lecture
- Open your Teams Desktop client or web app and go to Calendar
 on the left side of the app.
 - Select Meet now for an ad-hoc meeting or recording session.
- If you don’t see the “Meet now” option, switch browsers or download the latest Teams client.
- When you first join the meeting you will be in the pre-meeting waiting room. Choose your options for sound and video, and then select Join now.
- From inside the meeting you can share your screen, start a white board, or prepare a PowerPoint presentation.
- Once you are ready start recording your lecture.
- If you don’t see a Start recording option. Update your Teams client.
- Stop recording and end your call when you are finished.
- The video will process and upload to Microsoft’s video hosting site Stream. This may take quite some time.
- Get the link from the chat window in Teams and post to a canvas page or module.
Using PowerPoint to Record Your Lecture..
Starting a Canvas Conference
- Login to Canvas and navigate to your course.
- On the left hand side select Conference and then select the +Conference button.

- Select your name, duration, options, and course members then start the meeting.
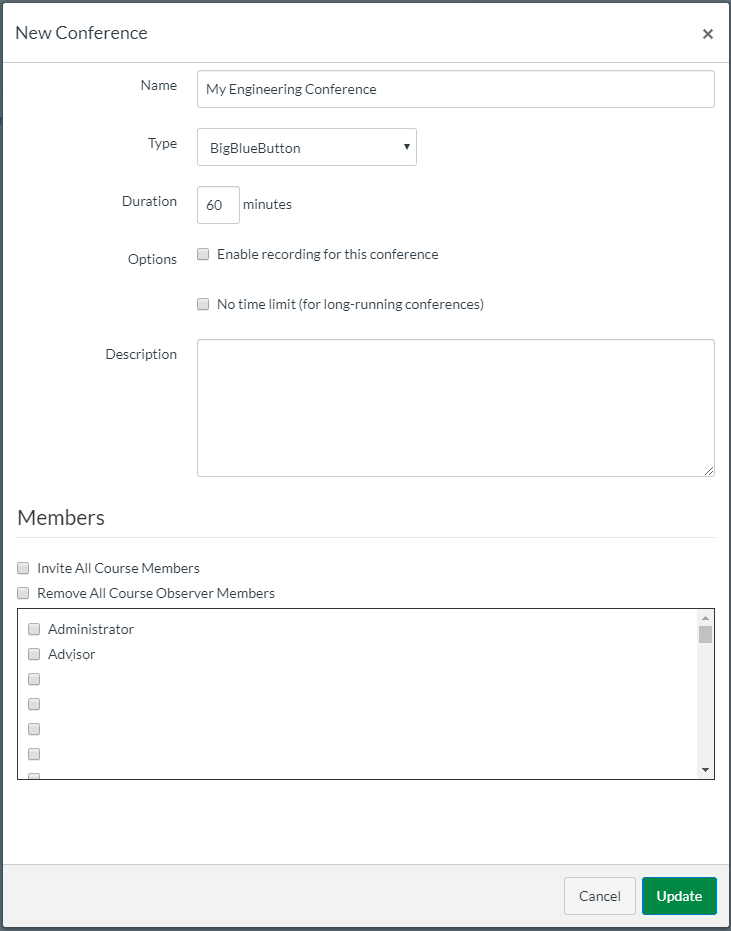
- This will open a web meeting in the web conferencing software BigBlueButton
Creating an ad-hoc Teams meeting from the Desktop Client
- Open your Teams Desktop client or web app and go to Calendar on the left side of the app.
- Select Meet now from the upper right hand corner.
- When you first join the meeting you will be in the pre-meeting waiting room. Choose your options for sound and video, and then select Join now.
- Once you’ve joined the meeting, You can invite someone by typing their name in the Invite someone box, otherwise you can click on the link icon to get a shareable link.
- They can join from their meeting invite using their eID username (eid@colostate.edu) and password, or as a guest. If they join as a guest you will need to admit them manually from the attendees window.
Scheduling a Teams meeting from the Desktop Client
- Open the Teams desktop client or web app and go to Calendar on the left side of the app.
- Select New meeting or double click on a specific time in the calendar to open the new meeting details window.
- In the box labeled Add required attendees start typing the name of your student.
- Be sure to add their EID account if you get two results, not their “@rams.colostate.edu” account.
- You only need to add one attendee to schedule a meeting. After you schedule the meeting you can get the meeting link and share it with whoever else needs to join.
- Add a title or details as needed.
- Click Save in the upper right hand corner.
- When it is time for the meeting, you can join from inside the Teams client or from your Outlook calendar by selecting the meeting and clicking Join Teams meeting.
- They can join from their meeting invite using their eID username (eid@colostate.edu) and password, or as a guest. If they join as a guest you will need to admit them manually from the attendees window.