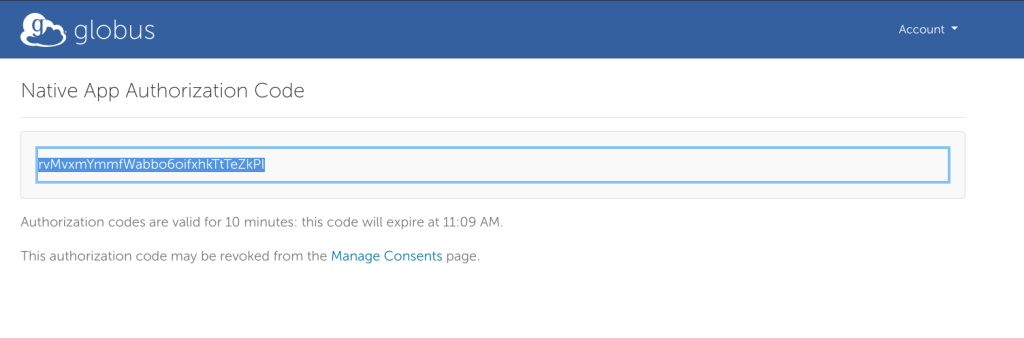
access_type=online&prefill_named_grant=hpc-submit1 —– Enter the auth code: rvMvxmYmmfWabbo6oifxhkTtTeZkPI
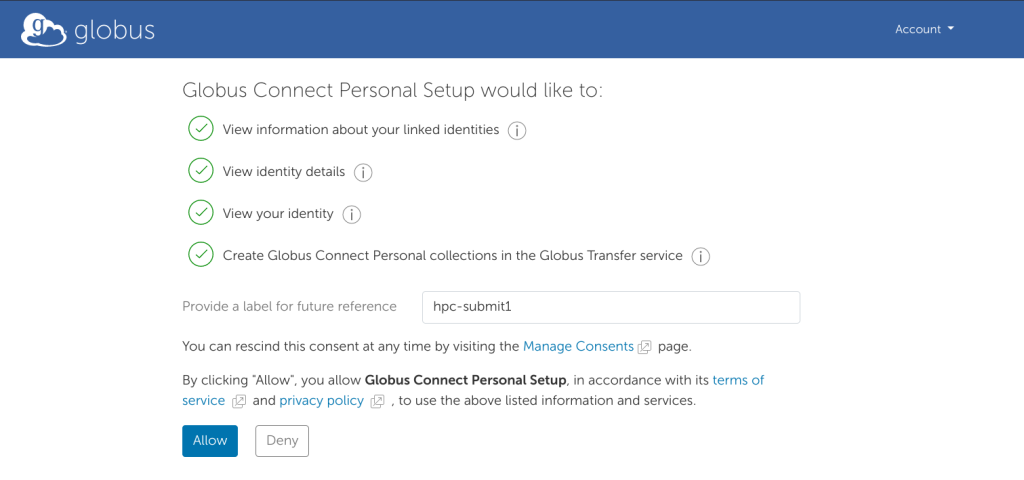
Copy and paste the link into a browser, log in and allow the permissions.
Copy the Authorization code and paste it back into the terminal
[c@asha globusconnectpersonal-3.2.3]$ ./globusconnectpersonal -setup
Globus Connect Personal needs you to log in to continue the setup process.
We will display a login URL. Copy it into any browser and log in to get a
single-use code. Return to this command with the code to continue setup.
Login here:
—–
https://auth.globus.org/v2/oauth2/authorize?
client_id=4d6448ae-8ca0-40e4-aaa9-8ec8e8320621&redirect_uri=https%3A%2F%2Fauth.globus.org%2Fv2%2Fweb%2Fauth-code&scope=openid+profile+urn%
3Aglobus%3Aauth%3Ascope%3Aauth.globus.org%3Aview_identity_set+urn%3Aglobus%3Aauth%
Ascope%3Atransfer.api.globus.org%3Agcp_install&sM&code_challenge_method=S256&access_type=online&prefill_named_grant=hpc-submit1
—–
Enter the auth code:
rvMvxmYmmfWabbo6oifxhkTtTeZkPI
== starting endpoint setup
Input a value for the Endpoint Name: c123456789-asha
registered new endpoint, id: 5eda6996-fe6e-11ee-8264-43ed2d92f852
setup completed successfully
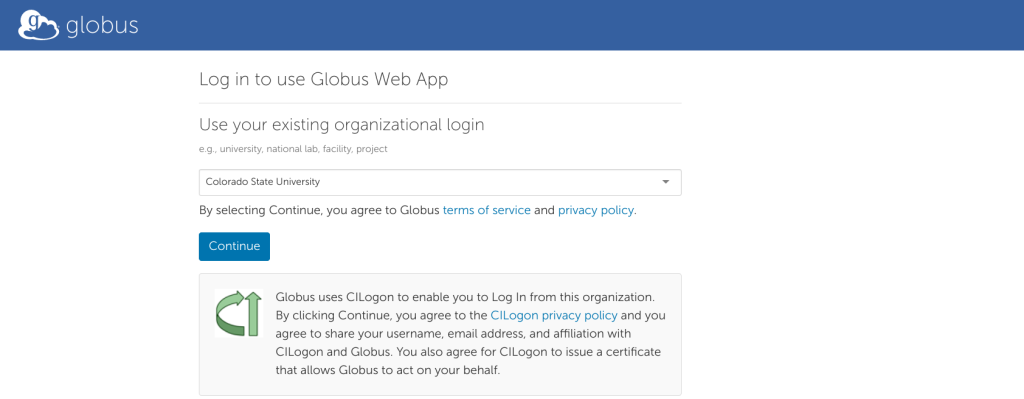
Sign into Globus using Organizational login. Will forward you to shibboleth + 2fa
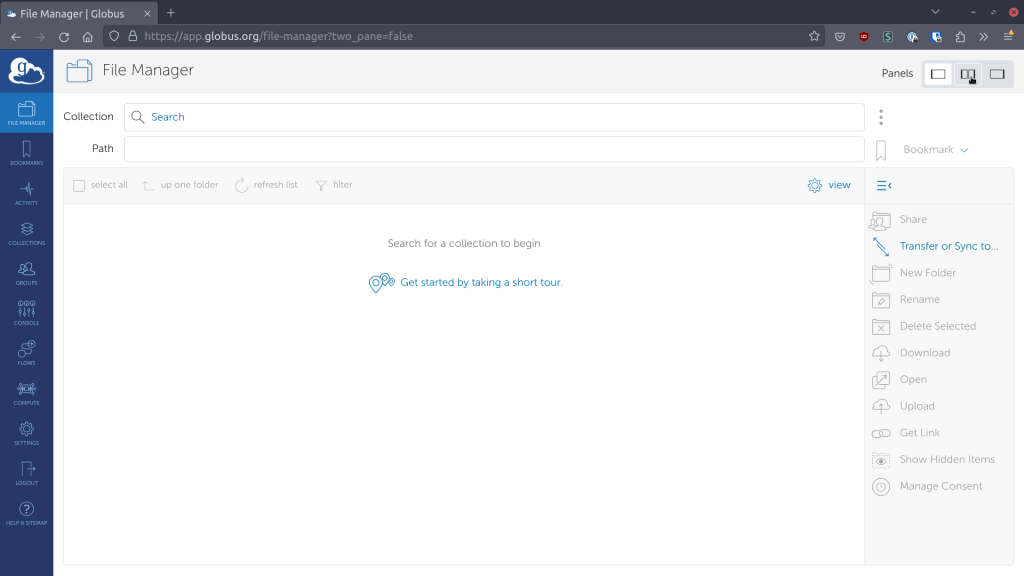
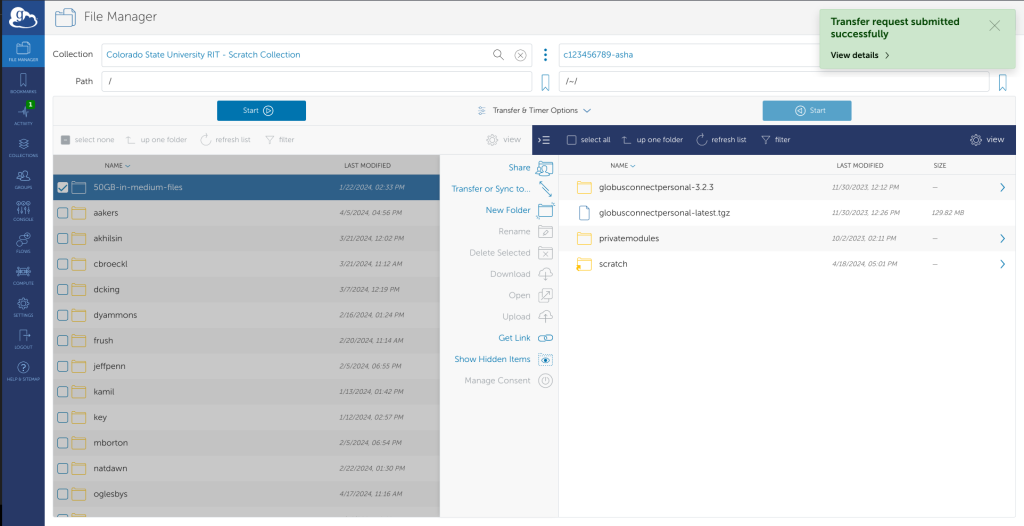
On login, chose the file manager on the left and its easiest to split the pane in the upper right
Search for the collection (AKA endpoints) you want to download from and to in each of the panels.
Drag and drop from one side of the other, or use one of the options from the popup menu.
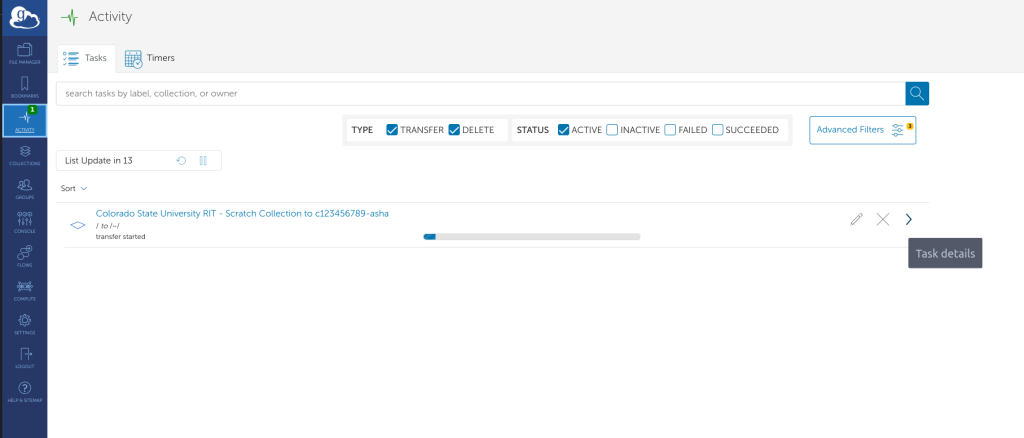
The transfer job will start. You can check logs/and completion status from the left hand side “Activity” tab. As shown above a green “1”. From there you can press the “>” button for more details on a job.
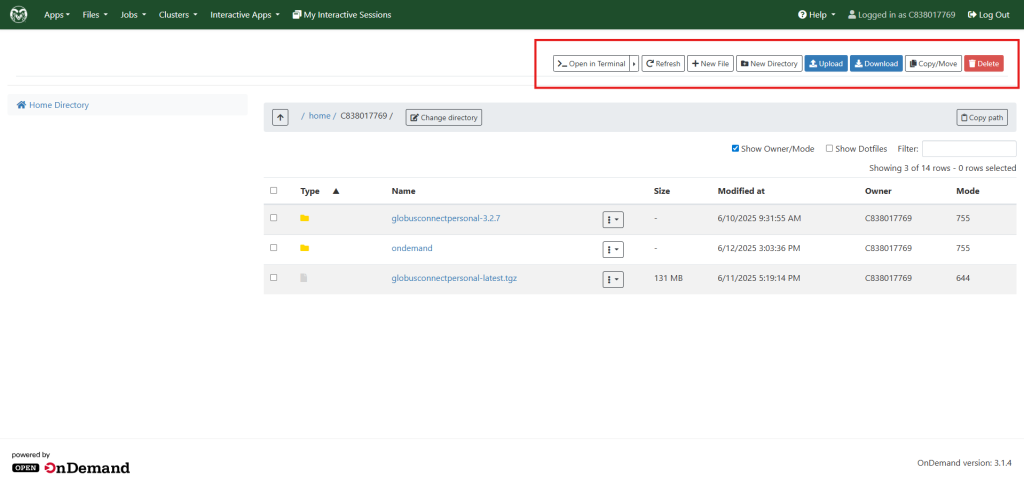
Make use of the toolbar highlighted in red to perform the required actions
Other available methods
Rsync – Recommended
rsync is a powerful linux utility to synchronize files which uses SSH protocol.It is highly recommended over other commands for large directories due to its efficiency, ability to resume transfers after interruptions and preserve file attributes.
It should be installed on both source and destination machines
Basic Syntax to use
rsync [OPTION]... SOURCE DESTINATION
To copy files from local machine to remote machine